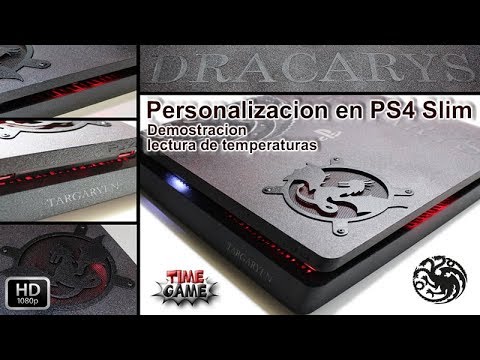
hello and welcome to all already am here of turn once again to bring you in this occasion the second part of the group of tutoriales that are creating to customise and improve the that it is the ventilation of ours playstation 4 sling first first of all as it would like me appreciate of everything heart this big received that has had the first part as always there is some that another detractor but well this is normal already in passing as osman a cordial greeting to all and invited to these people that are doubting in joining to the channel have by at all that it do not doubt in subscribe and especially as also command a cordial greeting to ours sponsor mo center well as what we go to do to continuation will be to add illumination led in our console that in this case the one who will see here is the mine with which play usually and before to continue it is necessary to leave some points very clear are very important because in this case yes that it is necessary to break the precinto guarantee then if have the guarantee in force I recommend you that you respect it and when it finalise if it does the work do it if already the have finalised in case you want to ship us in this work as advance this if we do not go us to do responsible of absolutely of at all because when it works with voltage of feeding is very dangerous any error or mishap that have it can repercutir in a very grave damage even no without console where clearly we we will not do us managers well also I go to add a small video because there is people that do not know have asked us some type of proof that if the entrance of air was effective himself or no as at all I have recorded a small video only where have done readings to real times so much with covers it removed with it covers it put and the orifice to the air free and afterwards with the orifice covered then here you will see the changes of temperature that there is and I think that if with this still convinces you I no longer can do absolutely at all and well already create that is all said now also as as I promised I bring you a small surprise is something very personal that has fact for me here present you to drag car is also we say in castilla of the fire of dragon and well there are a lot of people as already you will have deduced it in what it is the thematic of the console especially the people followers of the game of thrones it is related with the house targaryen and thus we have put him the name of trakr and his fire in the dragon have him place the shield of the emblem of the house targaryen or targaryen in the entrance I already you have recognised it it is what it did in the first tutorial and here also as we have put him target and as you can see this good console those that have not seen the first part was entirely white and him we have done a wash of image now is a grey colour metallised aged all the part from above has done with effects of reflection because if he warns if it is grey but if we move it would be red then afterwards also of all the part of down we have done it in grey metallised and good and I think that with this can check because his day it put the dragon and then in group it remains quite well this does not go to show clearly in the tutorial because first it is enough work afterwards is necessary to have enough practice in the game of layers of painting know use in the grafos and afterwards have a machine wisla hard depends adhesive as they are expensive things are things that do not learn of the night to the morning and think that here as we other much more economic options and afterwards also much simpler of do as it can be a skin that is the typical sticker of vinyl that if it puts well it remains quite chula and besides there is a big variety as you also can use the impression of hydrography as you call and here up I will leave you the links of the big pressure in case you want to throw him a glimpse and good and in general I think that already is all said now what go to do is to happen you the video this that I have commented you previously where do proofs of of the temperature so much with covers it removed with the abertura open and enclosed and like this will be able to see that yes that it is effective to the one hundred by one hundred what is this modification and already act followed as already we will begin with the tutorial already in passing I go to begin to disassemble what is the console and like this when we see us already would have what is the console say and the stage from above and the one of down if have doubts or do not know how disassemble it here up also go you to leave a link where taught how disassemble completely what are to playstation four rows and that at all we go to happen the video and inside moment we see us times beginning with what is the proof of temperature can see that I I have removed it covers it upper to what is the console that practically the temperature will be the same that if have the orifice that is to say the modification done of it covers it although it can vary some tenth but very poquito then go to do the proof as you can see I have here a digital thermometer with the probe type k that has entered in the exit of the source of feeding sport with call it that it is say where finalises the route of the ventilation and say that in this point it is that the point hole of the temperature and that more as you can see I I have it understood have left it more or less 45 minutes almost an hour lit so that it stabilise the temperature because the readings are not equal recently lit that leaving it stable as you can mark 39 with 3 this marks it because I have it we say in the menu of the playstation 4 clearly I can not be playing and doing the tutorial same time because it is impossible me it would go back crazy but well here go to can see what is the variation of the temperature as I say are the surroundings main of the console 395 goes up and drop also it is necessary to take into account that if the console detects a lot of temperature to the best commands that revolution poquito more then we go to see some changes but well more or less we will see it and it comes already said this go to begin go to put covers it also so that you see now it has paid this go to light it again take the mobile and go to commit it stops that see that there is not neither cheat neither cardboard afterwards we begin now we go him to place the confetti here to obstruct the that at all more put already see how go up quite a lot of tenth of hit [Music] we can see that it follows going up do not have arrived neither to a minute then we go to leave it that it go going out little by little as you can see have here the chronometer then here there is not neither cheat neither cardboard as I say and we go to leave it we go to do almost six minutes and stops go up the temperature seven degrees well after seven degrees added to the temperature for having obstructed the that it is it covers it upper that in this case they follow having the lateral entrances we go to remove what is the paper and now we will see that it will go going down little to little well as already after some minutes we have left that it reduce the temperature can see that it has not arrived to what is the initial temperature have 39 type right now do not agree me but we have happened of 39 and beak to 46 with 2 or with 39 to well very well and afterwards this clear after destroying what is the slow of air and when leaving it free have seen go to reduced as some four degrees then see as it oscillates if have the modification or do not have it so with this I think that has remained quite clear I no longer know what besides one of which already work in sound have the very good head so at all we go to go back to the tutorial main and inside a moment we see us well as once already of turn expect that have seemed you interesting the demonstration and well already go to begin with the work and as you can see I already removed what is the carcasa upper in the inferior we go to take throws it led always I recommend one of 12 volts fed to 12 volts can use the one of 5 but there are more points of 12 that of 5 in the console if have one of 5 can feed it in the positive of the usb and the one of 12 as usually I use what is the positive point of the fan if we have thought to do the zone lit of the fan I you I recommend that it was the first that that we do because afterwards it can us disturb what are those that go to see here then if you go to do the one of the fan would have to do the following remove the screws of star that go to go finding here and finally east of here that it was in head of bull detox of the number 9 and these of here also go them to slacken a poquito so that we can go up the sheet so that we remove it it covers it today we go to put goes it to be by this zone with the side now we go to hit and here also it is very recommended add him hot silicone because can despegar and then this is pipe what is the fan now what go to do will be to put the wired up for afterwards join this zone of it throws led with which have in this zone we take two pieces of wire grabbing usually a poquito longer stops not to remain short is that it is the negative we mark it to us and now we go to place the positive we do not go it to go carrying to the place by this zone without that go up to what is the reader so that no afterwards do not disturb with the mechanism very now it touches to put what is the sheet metallic at the end as we go to have to remove what in the metallic talk that have here that they are two screws of head of bull detox and afterwards go you to remove these two that have to the sides also beside which have removed of head of star because have the sheet we can not it put then like this us it will give also option to put the wire more inwards and now yes that we can place what is the stage it establishes appointment it is necessary to place the one who always it forgets and now if already we have it placed well we go to begin to atornillar again the sheet we place also the screws that have commented and all the rest of tornillería of the metallic sheet this will carry it here up and already we have it well as now we go to go with the zone of the contrary side of the fan that is the one who goes to light the zone usb and this as you can see carries almost I have it finishing and is because practically always it is the same work then goes to do too much long as you can see in this occasion I I have cut a piece of throws led of a group in total of 6 have put soldier the two wires and the shortest a marking the negative that have it here and east would be the positive these two go to go soldiers to this zone and afterwards can see in the another extreme that they are more long ban also negative marker and the positive now already would fix us with hot silicone in the two extremes as you can see here and here and already it would be fixed now take these two wires go through them east orifice and we give him the turn now we would take these two that also I have them prepared are the two groups of three and three go them to fix in these sides so we take [Music] well as this already have it practically finished what is all the circuit of throw led now go to begin already to join what are the wires these that are the ones of the fan the we go to carry to this side [Music] and now we go with this extreme that would be the same we say him this that have marked and of a positive well as once already connected all the pieces of throw led now what touches it is to give him the feeding have here the negative and the positive that they are those that have in one of the extremes of the piece of trial is of the frontal say that it is the as have the console is the of the right and the one of the left is the that goes through the orifice to feed to the rest so the negative can solder in any point of the chassis I I have put here a point of tin that it would remain us here and the positive to go connected in the pin of the brown wire also it could rascar a poquito the wire of brown and solder the directly or in quoting it in that is the piece that we have spent but to me it likes me more you can solder so we go to take first the negative in the positive as as I say to the brown well as already with this supposes that already it would have to go all the illumination if this go to do a proof now and we can see that yes that has gone out everything correct led led in the centre of the ventilation and in the frontal as good as now it would touch already close what is the console well as we already have mounted completely what is the console and now as I always have put it wanted to test in general all the group and they do this small demonstration of illumination that do always in east type of tutorial so at all we go to pay a poquito the lights and now go to see what such it remains [Music] [Music] and well as east has been already the result final of what has been the personalización of my console eat you can some can have checked I have put also illumination led here backwards because basically it had me sobrado some trocito of throws led of three leds and say as well to leave it by here it placed it and like this it remains more chulo and afterwards also what is the illumination of the entrance of the disk this do not have it place in tutorial because this already carries a poquito more than work it is necessary to put resistance and such then neither there is that arrive until this point but good as you can see it has remained enough well also it is necessary to comment that it is not the same see it entirely to dark that see it right now with light because it dissembles a lot of what is the illumination and also want to comment you a thing the tutorial has been very very very long are speaking of almost an hour of recording then now the setting it goes to have to reduce recortar a lot then if sometime you see that it has recortado too what was the we feel for real it is what there is no we want to do tutoriales neither of 45 minutes neither of half hour this would be a punishment for you and so at all already it touches to sack and as I say always if it served you of help the tutorial if it has you liked what have seen give us this like likes me that it does not cost absolutely at all and as I say as so much learn like teaching the right of all from here command you a cordial greeting and will see us very soon in the next tutorial until prompt [Music] and until the sight baby