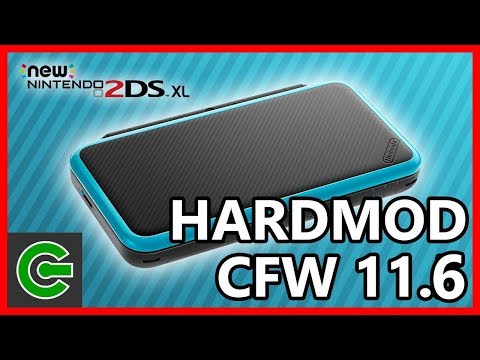
This is my 2DS XL running stock firmware 115 In order to run custom firmware, we will need to hardmod it
Flip the console and prepare a #00 tri wing screw driver We need to unscrew these four screw Remove the micro sd card Remove the stylus too Prepare a plastic opening tool then start prying the hinge part Be very carefull or you might break it Slide the opening tool to the right until the plastic case separated
Use another opening tool to pry the console edge Notice the headphone port You must pry a little harder at that part Separate the shell very carefully You must pull the speaker header with a tweezer
Unplug the speaker header on the opposite side too There is a camera flex ribbon cable in the middle You must unlatch this too You may use the plastic opening tool to lift the latch be very carefull You need to unlatch these flex ribbon cable from the socket Remove these screws with #00 philips screwdriver
Unplug the wifi antenna with plastic opening tool Unplug the battery header After you remove everything, you can lift the board Don't forget to remove the power button Focus at this area You have to make note of these solder pads Prepare a plain PCB board
We need to make a miniature board that will act as a terminal This is an optional step but you will need it if you don't want to disassemble the whole console motherboard if anything happens Cut the PCB into approximately 10mm x 4mm and make four seperate tracks as shown in the picture This is the miniature board It is so tiny
Put a double tape sticker on its backside Then stick the board to the metal surface Then you need to solder some wires to the board Use awg30 wire Each wire represents CLK CMD and DAT0 Solder each wire to the miniature board
Use GND point from the far left pin of the cartridge slot From this point you may reassemble the console's motherboard back to its case Prepare a Micro SD card adapter and disassemble it Make note of these pins and solder wires onto it I made mine like this
I also make note of each wire on the socket Solder the wires to the terminal board Flip the console and prepare Anker SD card reader Plug the micro SD card adapter to the card reader Then turn on the console
You should get a blue screen If it doesn't then recheck your soldering Open Win32DiskImager on your computer We will need to dump the console's NAND Plug the SD card reader to your computer
If your card reader compatible with the 3DS, then you will see the pop up window Just press Cancel to continue If you see another pop up window like this, then just press OK Win32DiskImager will detect a drive letter here Press the blue folder icon
Select the destination folder or directory to save the nand backup Then type the file name and press Open Press Read to start dumping the console's NAND Notice the created file and the dumping speed It will take a while to dump the whole NAND
Please be patient It is better to have more than one NAND backup for safety purpose So, type another file name and press read again I dumped the NAND three times Extract the package to any folder on your computer
Open the hardmod b9s installer folder Pick one NAND backup and copy it to hardmod b9s installer folder Rename the NAND backup to nandbin Open 114 11
5 firm folder Copy the NEW firm file Then paste it inside hardmod b9s installer folder Rename the NEW firm file to currentfirm Run install b9s executables This will create a patched NAND from the original NAND Press Enter to close the popup window This is the patched NAND
We need to write this NAND back to the console Insert the console's micro SD card to the computer Open the sdcard root folder then copy all the content to the console's micro sd card Now we will write the patched NAND to the console Open Win32DiskImager software Press the blue folder icon then choose the patched NAND Change the filter to all files Select NAND-patched
bin then press Open Press Write then confirm it by pressing Yes It will take a while to process Please be patient Press OK and Exit to continue
Remove the card reader from the console and computer Press and hold the power button to turn off the console Insert the micro sd card Turn on the console You will be at Luma3DS configuration screen if done correctly Select Show NAND or user string in System Settings Then press start to save the settings and continue Go to system settings and check its firmware version
The Sys prefix means it is running custom firmware on SysNAND Remove the SD card adapter wires from the console and start putting it back together Use tweezer to place the flex ribbon cable to its place Then clip it back Use the tweezer again to place the speaker header to the socket
Do the same for the opposite side Don't forget to remove the micro SD card from the console Or else you cannot fully assemble it Clip the top and bottom case Start it from the hinge part first
Then clip the front part together Then put the screw back to its place Insert the micro SD card to the console Open the Download Play app from the home screen Open the Rosalina menu by pressing L + Dpad Down + Select Choose Miscellaneous options
Then choose Switch the Homebrew title to the current app Press B several times the press home button to exit Download Play app Reopen the Download Play app It will open the Homebrew Launcher Select FBI from the app list and run it
Navigate to SD and then cias folder Select the current directory then select Install and delete all cias Press A to confirm Press B several times then press Start to exit FBI Press Home button then press close Unwrap the new installed apps Run DSP1 app This app is responsible for outputting sound for homebrew app Press B to exit the app and automatically delete it
Turn off the console Press Start and Power button to turn on the console Press A to create essential files backup Press A to continue Press Home button then choose more Then choose Scripts Select setup ctrnand luma3ds Press A to continue Press A to unlock SysNAND writing and enter the combo keys to continue Press A to continue Press Home button then choose more
Then choose Scripts Choose Backup SysNAND Press A to continue It will take a while to dump the whole NAND, please be patient
Press A to continue Then press Start to reboot the console The next step is to move the NAND backup to your computer Turn off the console Remove the micro SD card Insert the micro SD card to the computer Open gm9 then out folder
Copy the NAND backup And paste it to the safe place on your computer Insert the micro SD card to the console Congratulation, you have finished the hardmod tutorial for New Nintendo 2DS XL Thank you for watching this lengthy video I hope you like it
Please subscribe for more upcoming tutorials


