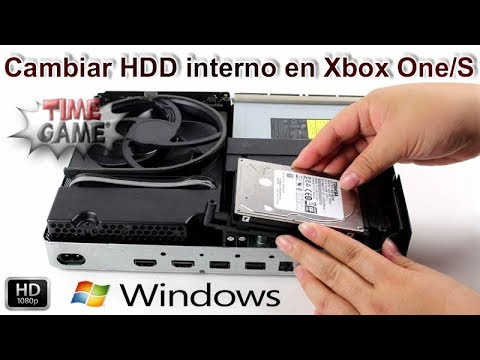
hello that such welcome fellow friends already I am here once again with all you to bring you another new tutorial but first and as it already is usual want to command this cordial greeting to all the subscribers of the channel also to the subscribers to the cuales also invite to that join to the channel time game and like this can receive notifications of new tutoriales leave ask comments to which I is loved to answer and as no neither without forgetting us to command the cordial greeting to our sponsor most center well going back what is the subject of the tutorial in this occasion what I go to do will be to teach you to change the that it is the internal disk of a xbox one in this occasion have chosen the model s or the model slim go it to do to través of windows goes to be much more easy much simpler only has a small problem that is to have the language of the operating system that is to say have windows 7 windows 10 windows the that it was it has to be in good English now I go to comment a poquito what it is necessary well the console does not do fault to appoint it but a hard disk I have chosen one of 500 that it is equal that she has to since I have placed it can insert one of a gives you of two even of four and the one of four no it tested there are people that says that it goes well there are others that no but until of two give you I have tested and it goes perfect afterwards also is advisable have what is an adapter usb esata that it is what uses to be able to stop can have an external hard disk if it have goes you to go very well and if no as have to connect it directly to yours tower to your pc and also it could do what is the process afterwards also a pendrive or a unit usb that it was minimum of 4 gigas if it is smaller of 4 gigas afterwards go it to be able to insert what is the firmware that is to say the archive of system therefore no it will cost and well what more as you can see I already have disassembled practically the console this do it especially as to lighten a poquito what is the tutorial but well does not happen at all to those that have experience stops until arriving until this point and those that no here up to the upper corner right I will leave a tutorial or a link that you will see with a symbol of information him dais and here will be able to see a tutorial eat I say of a taught to disassemble by complete what is the xbox one s so at all said this go to begin what go to do first sera we take a destornillador detox or dr have you east is the one of 8 no east 79 you can use this 8 the 9 or the one of 10 710 it is the biggest and sometimes can be that I slipped in what it is the drawing of the screw then I recommend the subject that it goes very well we take the console give him the turn attach the disk of some hand and we remove these two screws the c3 and the c4 [Music] very done this give him another the turn to the console now we throw upwards and well here we can do two things leave the wires connected or remove them I prefer to remove them because like this it does all more comfortable and now if we can remove the rest of console to a side well as we already have what is the disk hard ancient now what go to do it will be to remove what is the base will remove these four screws and one already with this have already practically it was what is the hard disk leave the base in a side and now remove also what is the good adapter as with the hard disk ancient was go to begin already with the process of the new hard disk for this have to go to the pc of the computer where go to create the necessary partitions so that it can we say the console xbox recognise east hard disk then go us to what it is the computer or the tc and inside moment see us well as once already in ours computer that is to say our pc it first that go to do will be to download the necessary that it is this of here so much the use one that would be the archive of system the firmware like the folder web that they would be the tools to be able to create the partitions in our disk hard this go it to be able to find here down in the information of this tutorial I go to leave the links so that you can download it without problems and well eat you can see I already have decompressed it so much one that would be this folder of system and the win that would be the folder of good tools also I have prepared what is the unit usb that have it here of 8 gb very important this take it into account it is necessary formatear side give him format and ntfs because if we leave it in format fat of to 32 the unit no it does not go to work that is to say the console no it goes it to recognise can see here ntfs afterwards I also have transferred already the folder of the system for like this lighten a poquito of the tutorial is so simple like taking and dump it to the usb and in the subject of the hard disk as I is mania do not know but likes me leave it empty entirely the erase all the partitions or all the information that have although afterwards the program also it goes it to do but good to me likes me leave it entirely empty this does not do fault that do it if you want to but well as you can see it is empty from zero now if the most important is the language in this case I am using the windows 7 ultimate and precisely as it did not have installed what was the language English therefore it could not execute the that they are the tools because they are prepared for the language in English then clear as for the one of control as you can I already have it in English all but before had it Spanish the I have to change in the case that no have the installed English language the you will have to do if it is windows 8 windows 10 think that already comes with the included packages and if it is windows 7 depending of the that have ultimate the home or was the role that was as you already have that look for a tutorial where teach how install it that it is the package of languages in English well as said this now go already with the process we take we open the folder win we look for in the archive crate xbox drive we give him right button execute it like administrator we press a key and see how begins the process now it goes us to do a reading of the units that have as you can see I have here the one of 465 gigas that is the number 2 and here below says us that we select as in my case is the number 2 and now will begin to create in 1 first warns us that they go to erase all the data of the disk that did that if in the problem here it says us that we select the type of hard disk that have the option would be that it do it automatically the time would be the one of 500 gigas the cell and the one of the one of 2 here as you can see ours of four cloths because as I have said there are people that says that it gives him problems there are people that no then here this program only will arrive until two backwards we go to select the time we give him to the intro and now yes already will begin to create the partitions can see it here very now it goes us to formatear what are the partitions that is to say we go to see how go deleting again and again this do not know very very why does it me I imagine because the first partitions that the remained creates donovan encrypted for the xbox and now what will do will be delete them again and will go back to create already encrypted for the xbox and now I imagine me from already it begins another time goes back to create now with a process a poquito slower that the previous and already we want the 5 partitions created well in east in this point that happened me to me in the first time is saying you that press a key now can see that the course is not activated by the so much right now it is it was the symbol of the then clear system by many grace to the keys does not go to react you have to puncture inside and when you see the cursor then go to any key and now will begin to install what they are we say the archives or the necessary information so that afterwards the console recognise the archive of the system or the firmware and well already with this as it has finalised the process close all the units or partitions and now yes already it would touch as desconectar our hard disk of the usb esata and extract what is our unit usb and like this we go back again again to the that it is ours teams web well as already once of turn would have already prepared what is our hard disk with his partitions corresponding and the unit usb with the archive of system that is to say with the firmware well now what go to do will be place what is the hard disk and we would have to take again what it is the console first go to place him the adapter the base of the hard disk and we place him what are the four screws of subjection well we go back to place what are the wires in his connections and we go what is the hard disk to his place and now attach the disk of some hand and like this we place the two screws that they attach the base of the disk and we have done this already have practically all prepared now touches as connect the unit usb and now floor put here in the unit use the connection 1 but well could put it here here or if we want here it advance it is the same comment in the wire hdmi and in the wire of feeding well as once connected everything installed what would touch would be to initiate the process of installation of the firmware but this it is necessary to do the following because if we do not do this small combination of buttons does not go us to go out we say the screen of solution of problems press the button of synchronise controls and without soltarlo we press the button of injection soltamos the direction and go back to press it now we go to go in a pitido as already we can soltar all the buttons and of this form goes us to go out as I say the screen to solve problems then already only it would touch to take the control and we go to select the option of update of the system this yes with ours ours unit usb already connected we give him and now as it will go out us a screen that I go it to put go it to show here well and this process as it goes to take a good while because now what is doing is to install the update in the hard disk afterwards goes us to do one comprobación of this update and by last apply the update to what it is the machine of the xbox then east process can take between 10 15 minutes more or less and this if we no longer we go to have to do absolutely at all it goes it to do only the machine and it that yes that go to see is like the machine reinicia she alone varied times this yes in one of them as we will see as at the end it gives us an image in where it sees the control of the console that now go to teach here is to say it I go it to show and well already as with this already would have finalised what is the installation of the hard disk with his firmware then now already touches to say the of always if it liked you the tutorial it served of help already know to give us that like likes me that it does not cost only at all and with these small details we can follow here day after day with all you also remember you of share these tutoriales by the networks social because as I say so much teach like learning is right of all like this that from here as always I say you you control a cordial greeting and will see us very soon in the next tutorial until prompt [Music] and until the sight baby


